
Present your slides
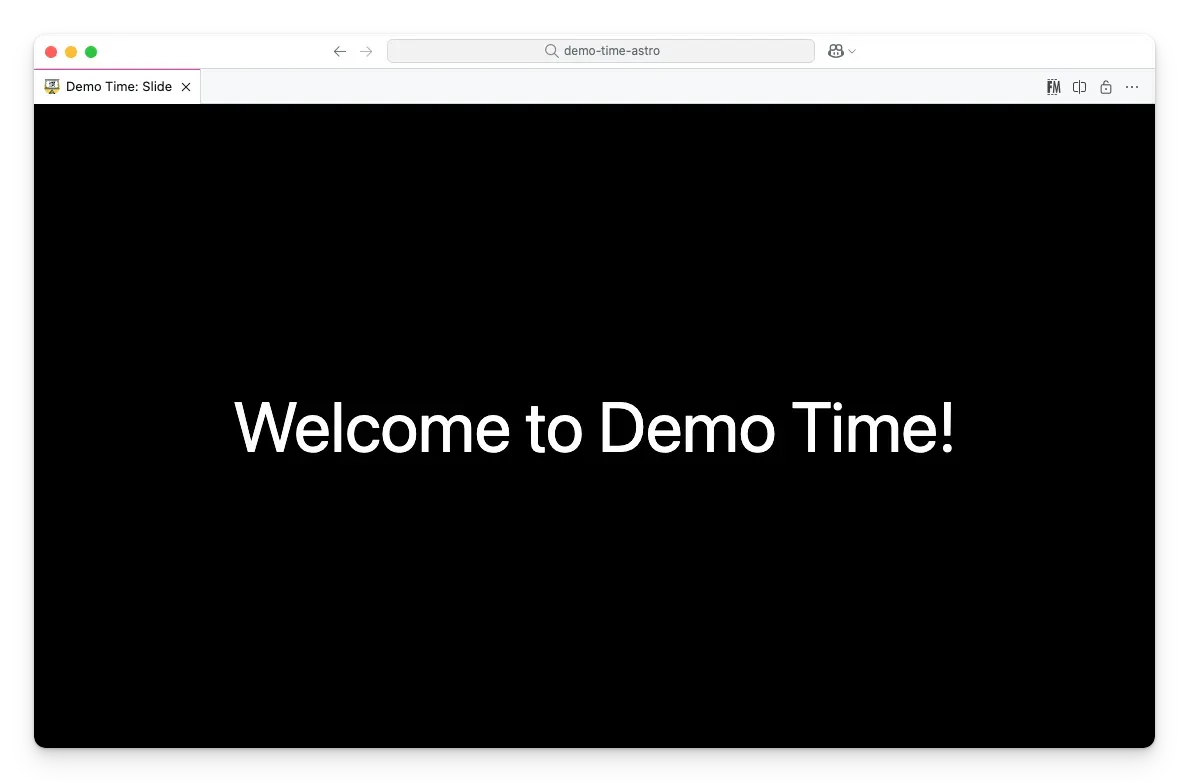
Demo Time is more than just a tool for live demos, it also lets you present slides seamlessly within your editor. With Markdown-based slides, you can deliver presentations without switching between different applications, ensuring a smooth transition between your slides and demos.
Creating slides
To create slides, start by creating a new Markdown file and adding your content:
---theme: default---
# Title
Hello, **Demo Time**!
You can also create multiple slides within the same Markdown file by separating them with three hyphens (---). This is useful for grouping related slides together. For example:
---theme: default---
# Slide 1 Title
Content for the first slide.
---
# Slide 2 Title
Content for the second slide.Slide settings
You can customize your slides using the following properties in the front matter:
theme- Specify the theme for the slide.layout- Choose a layout for the slide.transition- Set the transition effect for the slide.image- Set a background image for the slide.video- Set a video for the slide (works with video layout or custom layouts).customTheme- Provide a custom CSS file for the slide.customLayout- Specify a custom layout for the slide.autoAdvanceAfter- Automatically advance to the next slide or demo after a specified number of seconds.
Themes
Personalization matters! Demo Time allows you to customize the look and feel of your slides by selecting a built-in theme or creating your own.
To change your slide theme, you can specify a different theme in the slide configuration with the theme property or provide a custom CSS file in the demo JSON file.
Demo Time has the following built-in themes:
defaultminimalmonomiunnamed
Layouts
Demo Time supports various slide layouts, with the layout property, to help structure your presentation effectively:
default- A standard slide layoutintro- Ideal for opening slidesquote- Perfect for displaying key takeaways or citations- … (more layouts available)
Transitions
Transitions add a dynamic touch to your slides. You can specify the transition effect for your slides using the transition property. Demo Time supports various transitions, including:
fadeInslideRightslideLeftslideUpslideDownzoomInzoomOutrotateInrotateOut
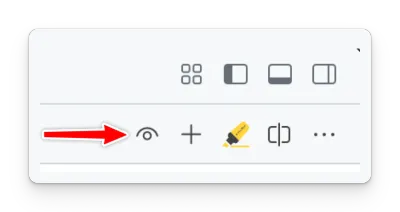
Slide preview
When you create a slide, you can preview it by running the Demo Time: Open slide preview command or by clicking on the open preview (eye) action from the editor title bar.
Presenting slides
To incorporate slides into your workflow, add them as moves in your scene script or configuration files. This ensures you can control when and where your slides appear during the presentation.
Use the openSlide action to open a slide in the slide view.
{ "action": "openSlide", "path": "<relative path to the file>", "slide": "<slide index you want to open (1-based) (optional)>"}action: openSlidepath: <relative path to the file>slide: <slide index you want to open (1-based) (optional)>
```yamlaction: openSlidepath: <relative path to the file>With this approach, you can seamlessly integrate slides into your demos, making your presentations more engaging and dynamic.
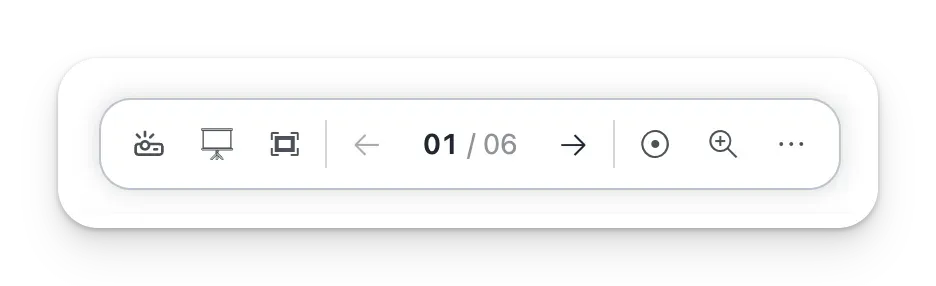
Slide controls
When previewing or presenting slides, a compact control bar appears at the bottom of the slide. It is organized into three sections — view tools, slide navigation, and slide tools — and tucks the less-common actions into a More actions (…) menu so the bar stays uncluttered and adapts to narrow windows.
View tools
- Toggle presentation mode: Toggles presentation mode, which allows you to use your clicker or keyboard to navigate through your slides. The button is highlighted while presentation mode is active.
- Toggle presentation view: Toggles the presentation view, which hides VS Code UI areas (status bar, tabs, activity bar, …) for a distraction-free experience. You can also use the
setPresentationViewandunsetPresentationViewactions, or theDemo Time: Toggle presentation view (hides status bar, tabs, and activity bar)command. - Toggle fullscreen: Toggles Visual Studio Code’s fullscreen mode.
Slide navigation
- Previous: Triggers the previous move (only if the
demo-time.previousEnabledsetting is enabled or when using grouped slides). - Slide counter: Shows the current slide and total (for example
01 / 05). When slide thumbnails are available, selecting it opens the Go to slide overview so you can jump straight to any slide. - Next: Triggers the next move.
Slide tools
- Toggle laser pointer: Toggles the laser pointer to highlight specific areas on your slides. The button is highlighted while the laser pointer is active.
- Toggle zoom: Toggles the zoom feature to zoom in on parts of your slides. The button is highlighted while zoom is active.
- More actions (
…): Opens a menu with the remaining actions, grouped for discoverability:- Slide (only available when you are not in presentation mode)
- Mouse position: Toggles the mouse position overlay on the slide, which can be useful to position elements on your slides.
- Open slide source: Opens the source file of the slide in the editor, allowing you to edit the slide content directly.
- Workspace
- Show demos: Opens the Demo Time panel to access your demos and slides.
- Close sidebar: Closes the side bar to provide more space for your slides.
- Hide controls: Hides the slide controls and mouse, allowing you to focus on your presentation without distractions.
- Slide (only available when you are not in presentation mode)
Auto-advancing to the next slide
You can enable auto-advancing to the next slide after a specified duration by using the autoAdvanceAfter property in your slide configuration.
---layout: defaultautoAdvanceAfter: 3---
# Going to the next slide in 3 seconds
------
# End of the demo
Header and Footer
Learn how to add and customize headers and footers in your slides for branding, context, or additional information. See the Header and Footer documentation for details and examples.
Notes
If you want to add notes to your slides or demos, you can check the notes section of the documentation.