
Adding demos
In the getting started guide, you learned how to initialize the extension with a sample demo. In this guide, you will learn how to add your demos to the demo time configuration.
In version 1.9.0, Demo Time introduced a new Config Editor GUI that makes it easier to create and manage your demos and its related steps. That means that you now have the option to create your demos in a more visual way, without having to edit JSON or YAML files directly. You can still have the option to switch back to the code view if you prefer by setting the demoTime.openInConfigEditor setting to false.
Adding your first demo
Now that you have initialized the extension, you can start adding your first demo steps.
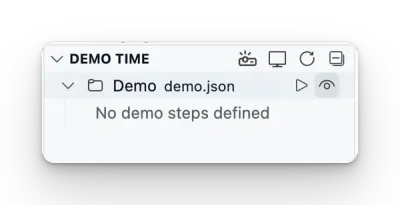
You can open the newly created demo.json file in the .demo folder manually, or you can click on the “eye” icon in the Demo Time view to open the demo steps editor.
Once the demo.json file is opened, you will see the visual editor to create new demos and steps.
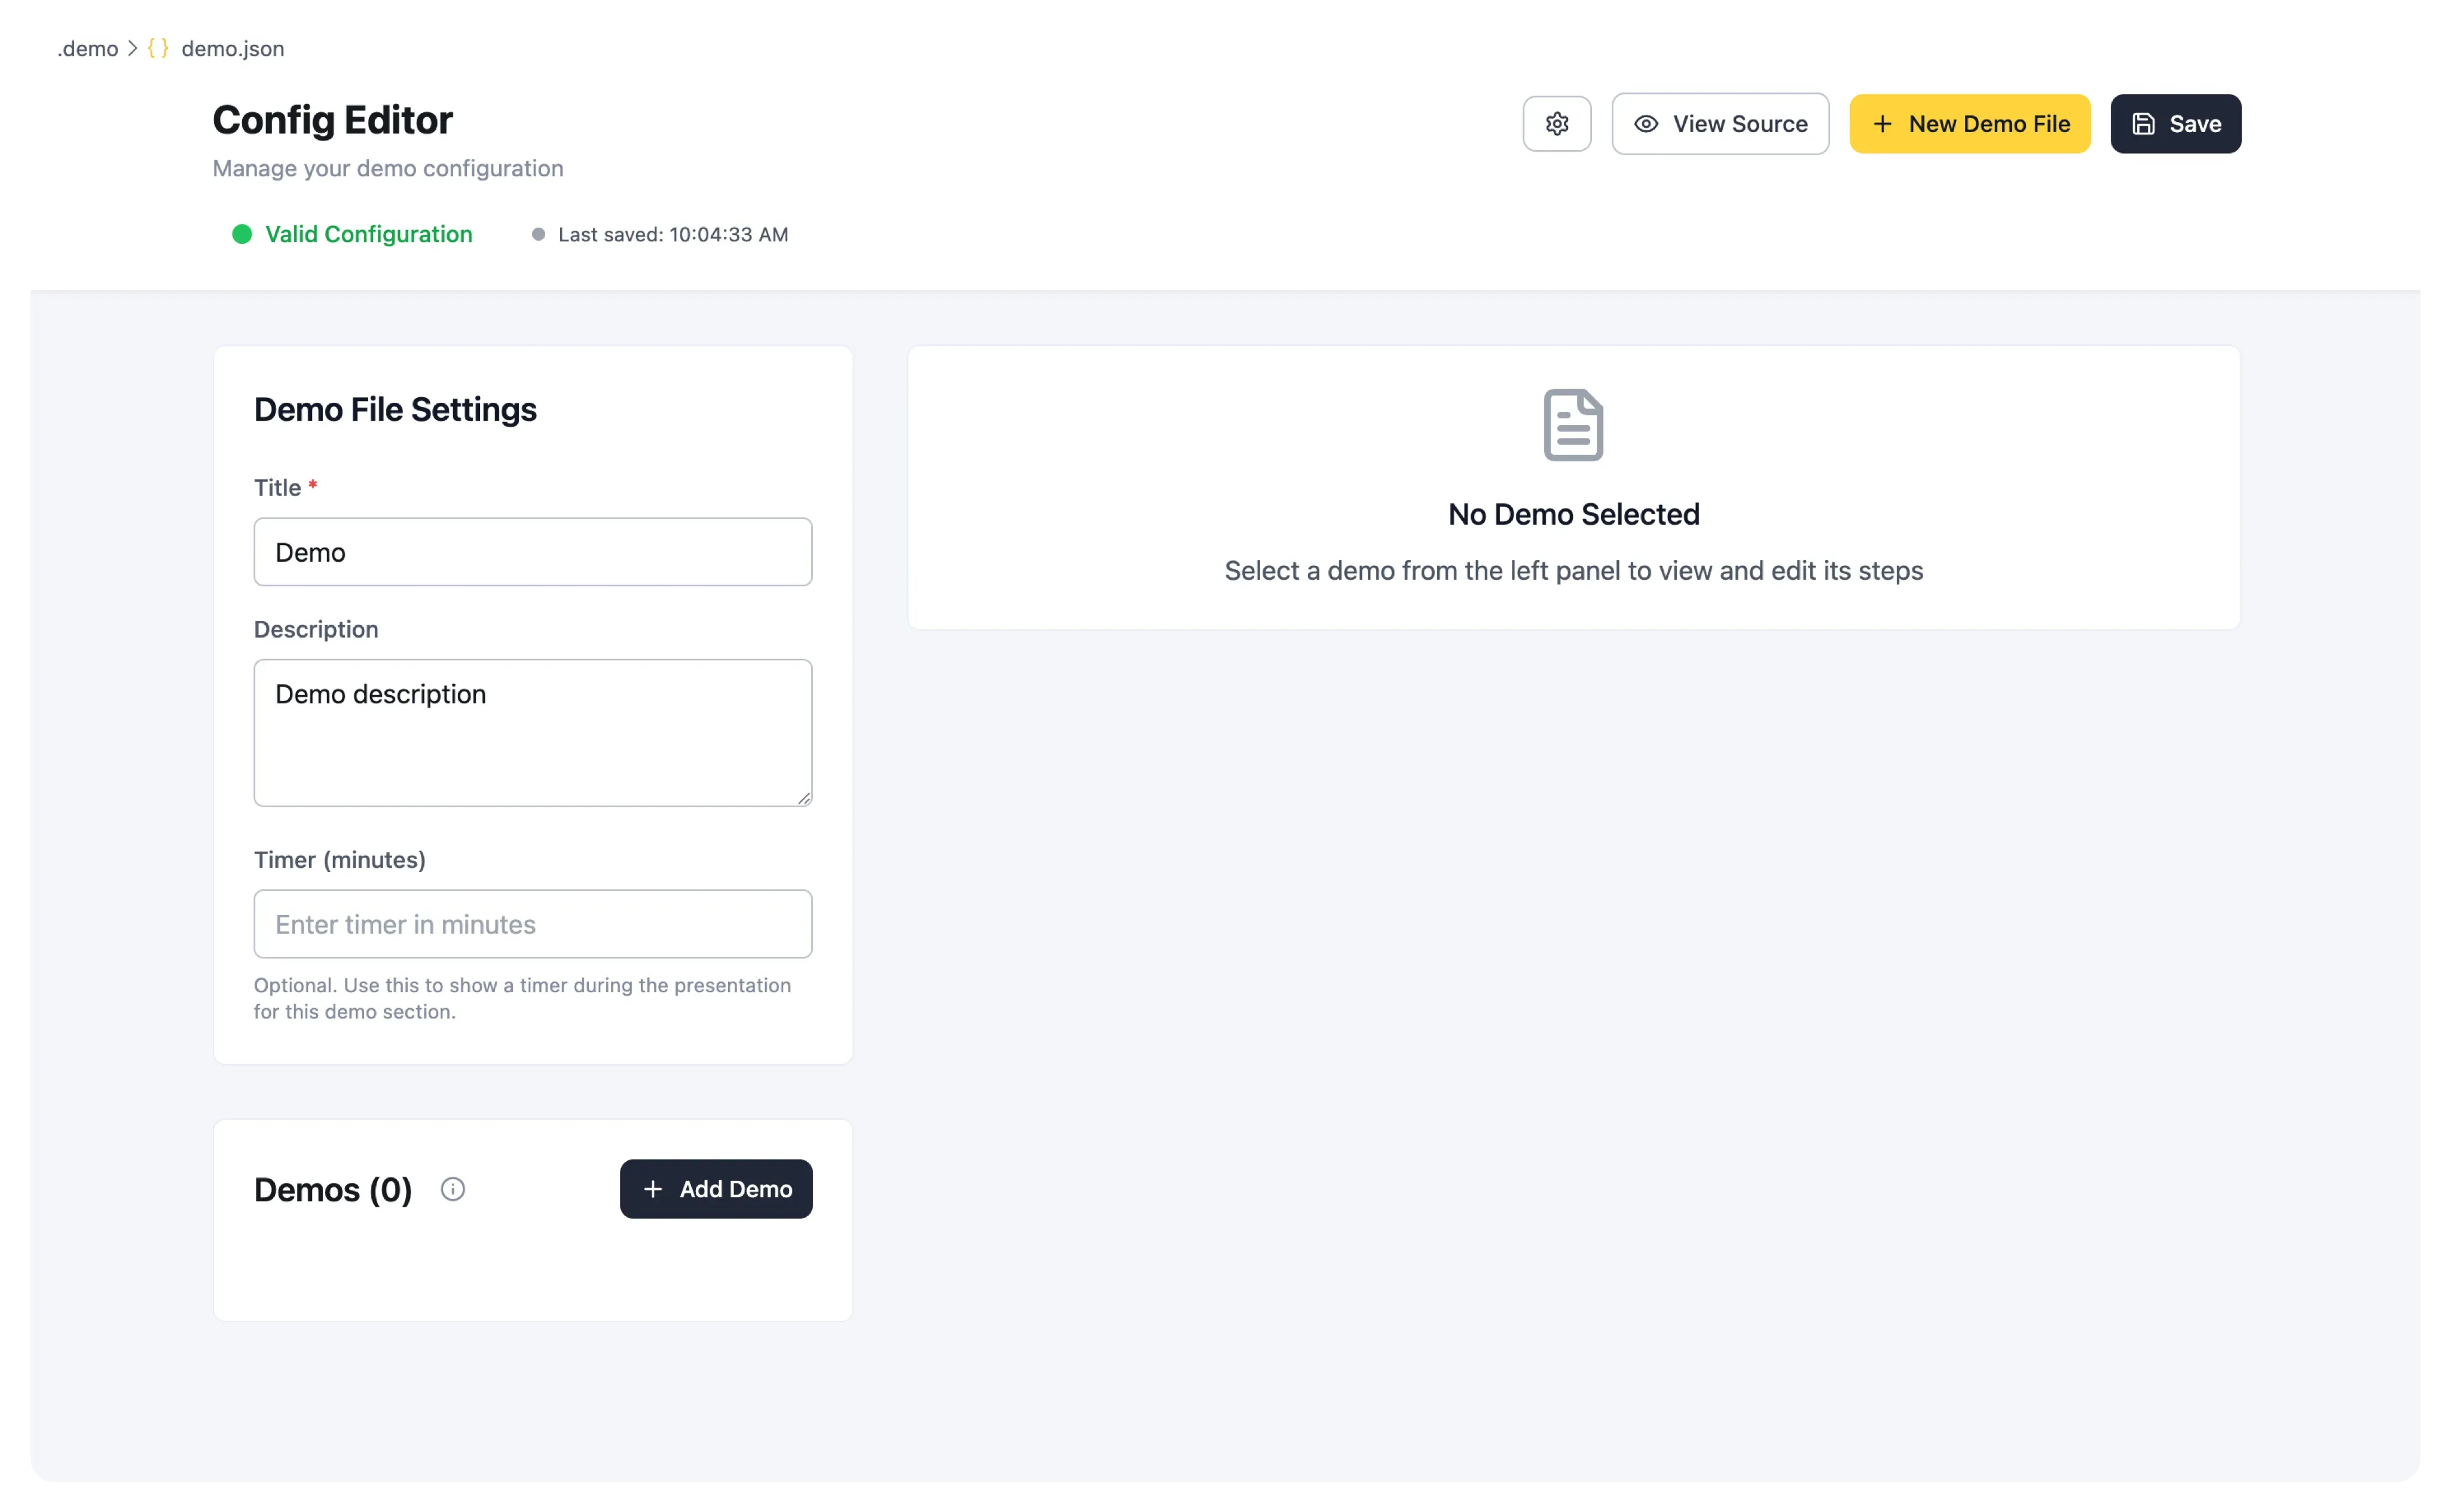
Click on the Add Demo button to create your first demo.
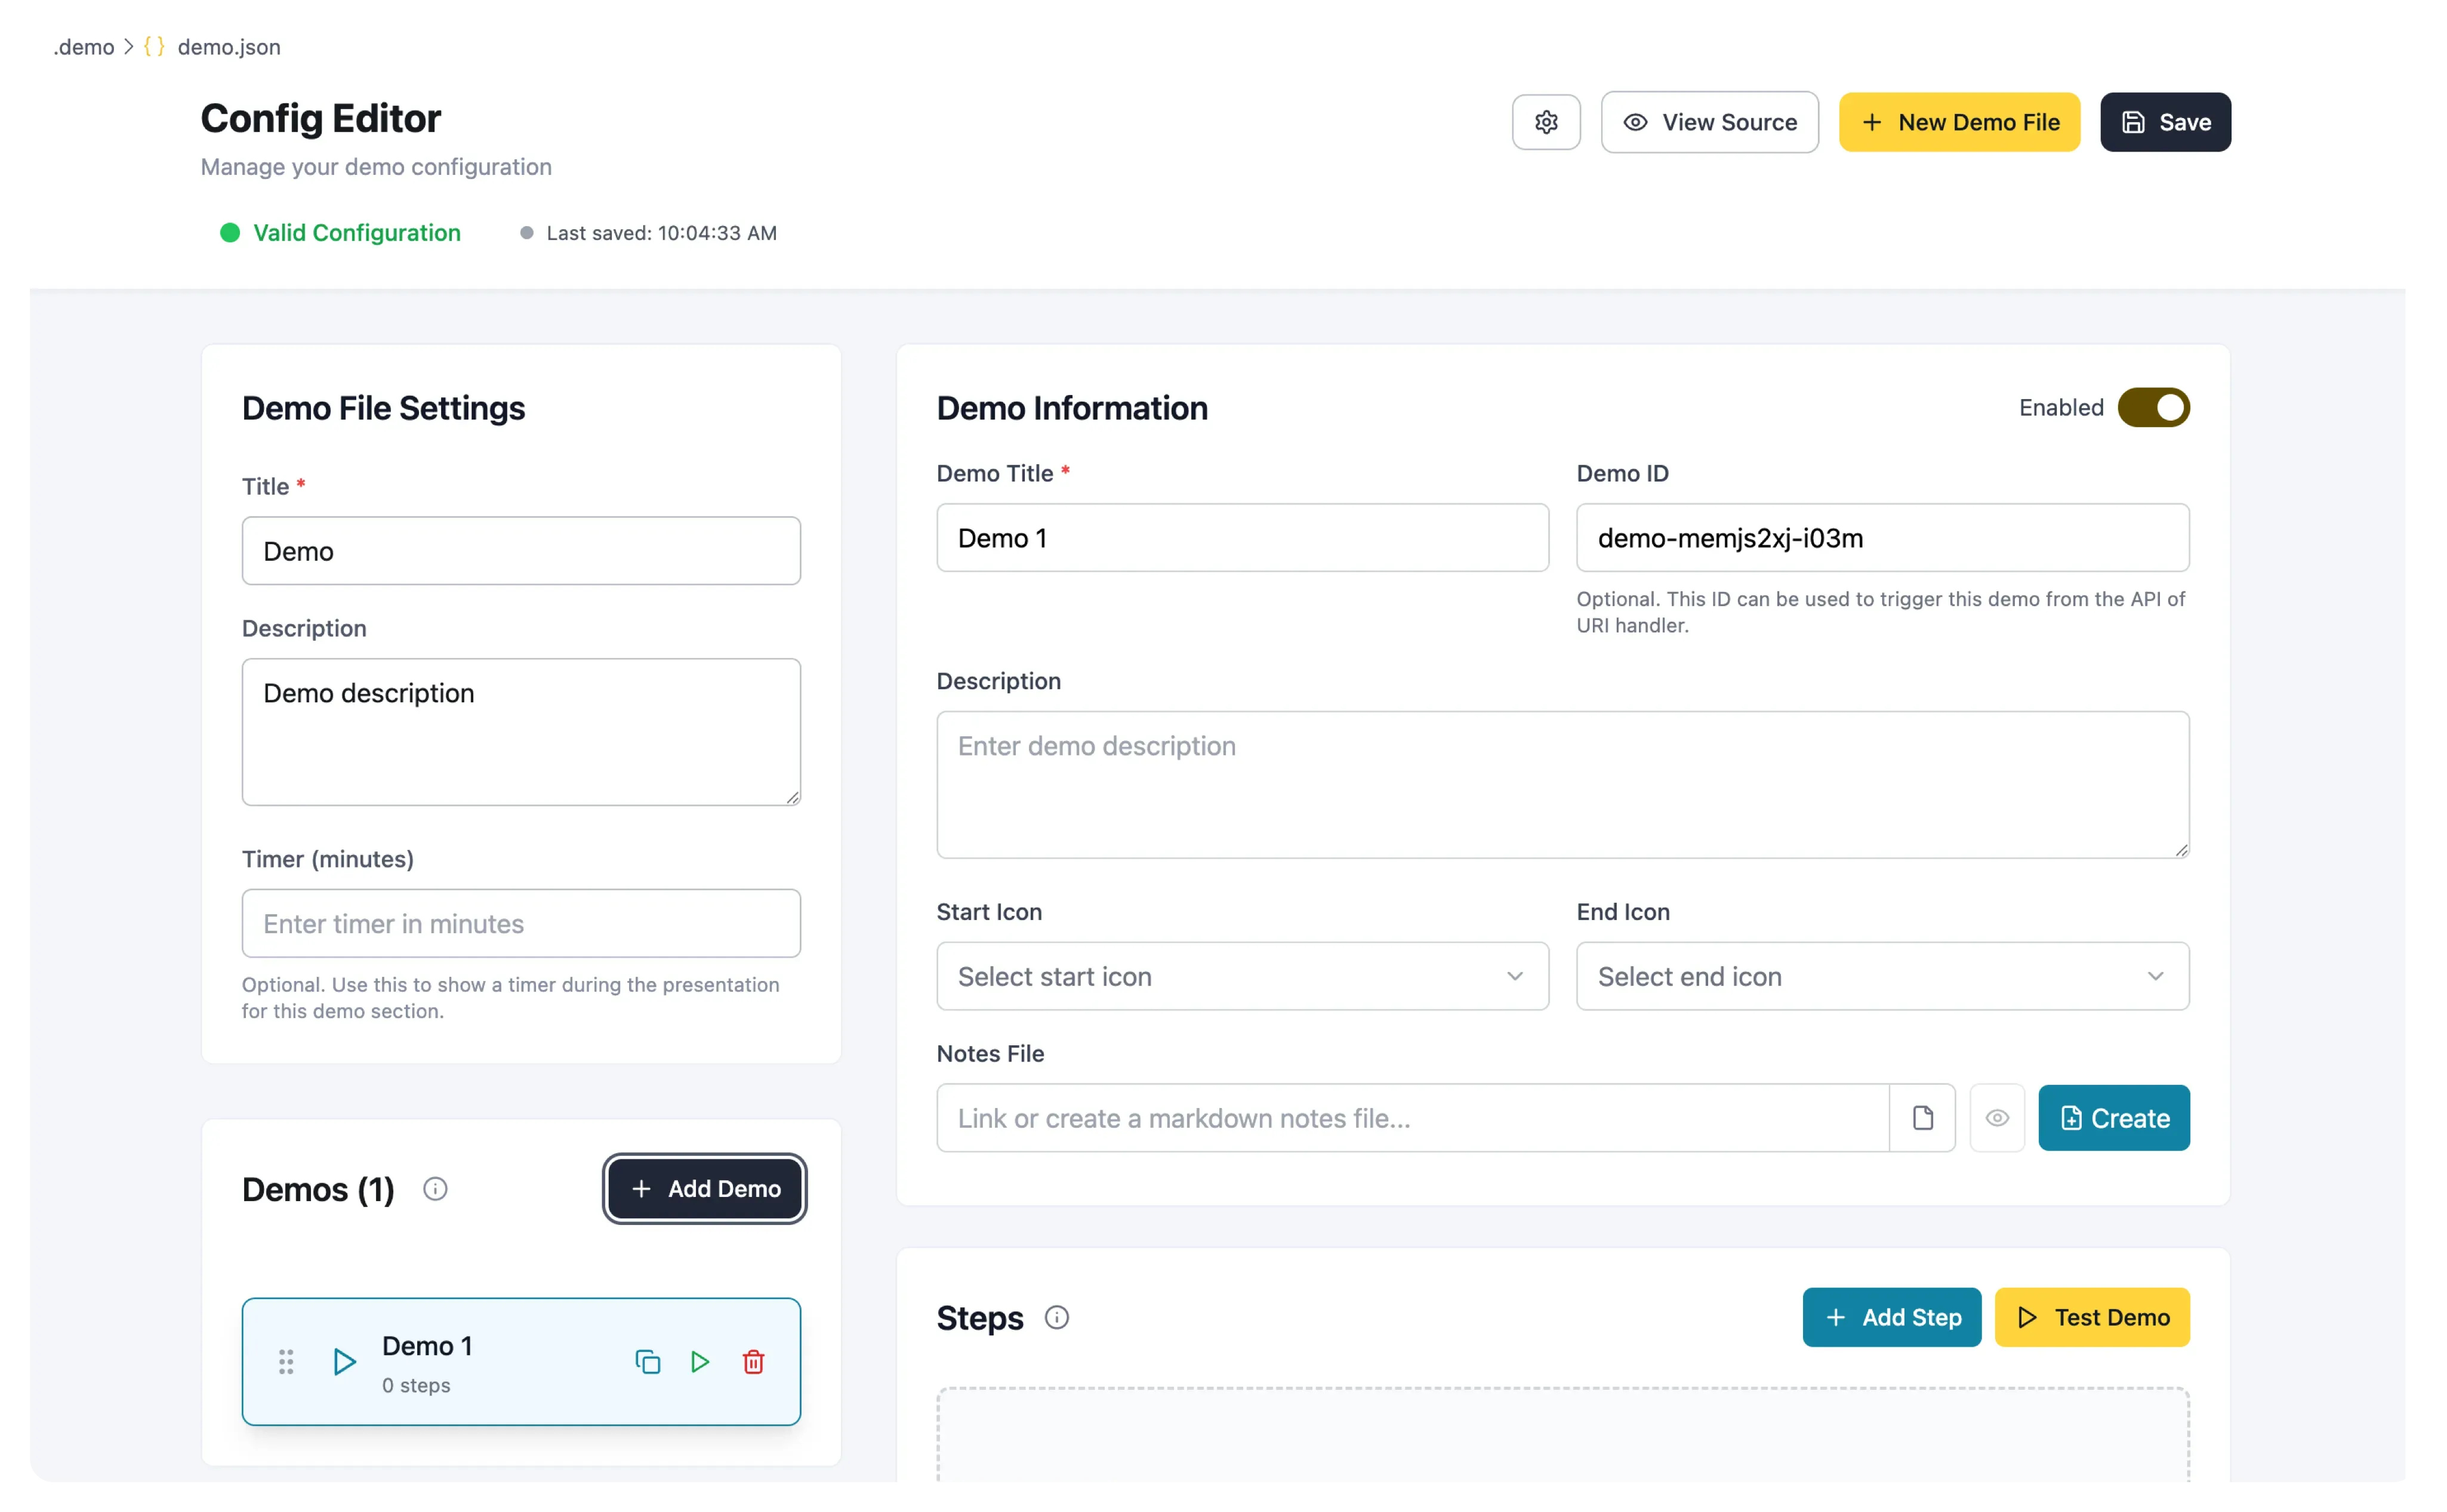
In the Demo Information section, you can define the settings for your demo like:
- Title: The title of your demo.
- Description: A brief description of what your demo does.
- Demo ID: The unique identifier for your demo, which can be used to trigger the demo via the API, URI Handler, or
runByIdaction. - Icons: The icons that will be used in the tree view panel.
- Notes: Any additional notes or information about your demo.
Adding steps
After the first demo is created, you can start adding steps. Each step that you add to a demo will be automatically ran in sequence when the demo is triggered.
Click on the Add Step button to create your first step.
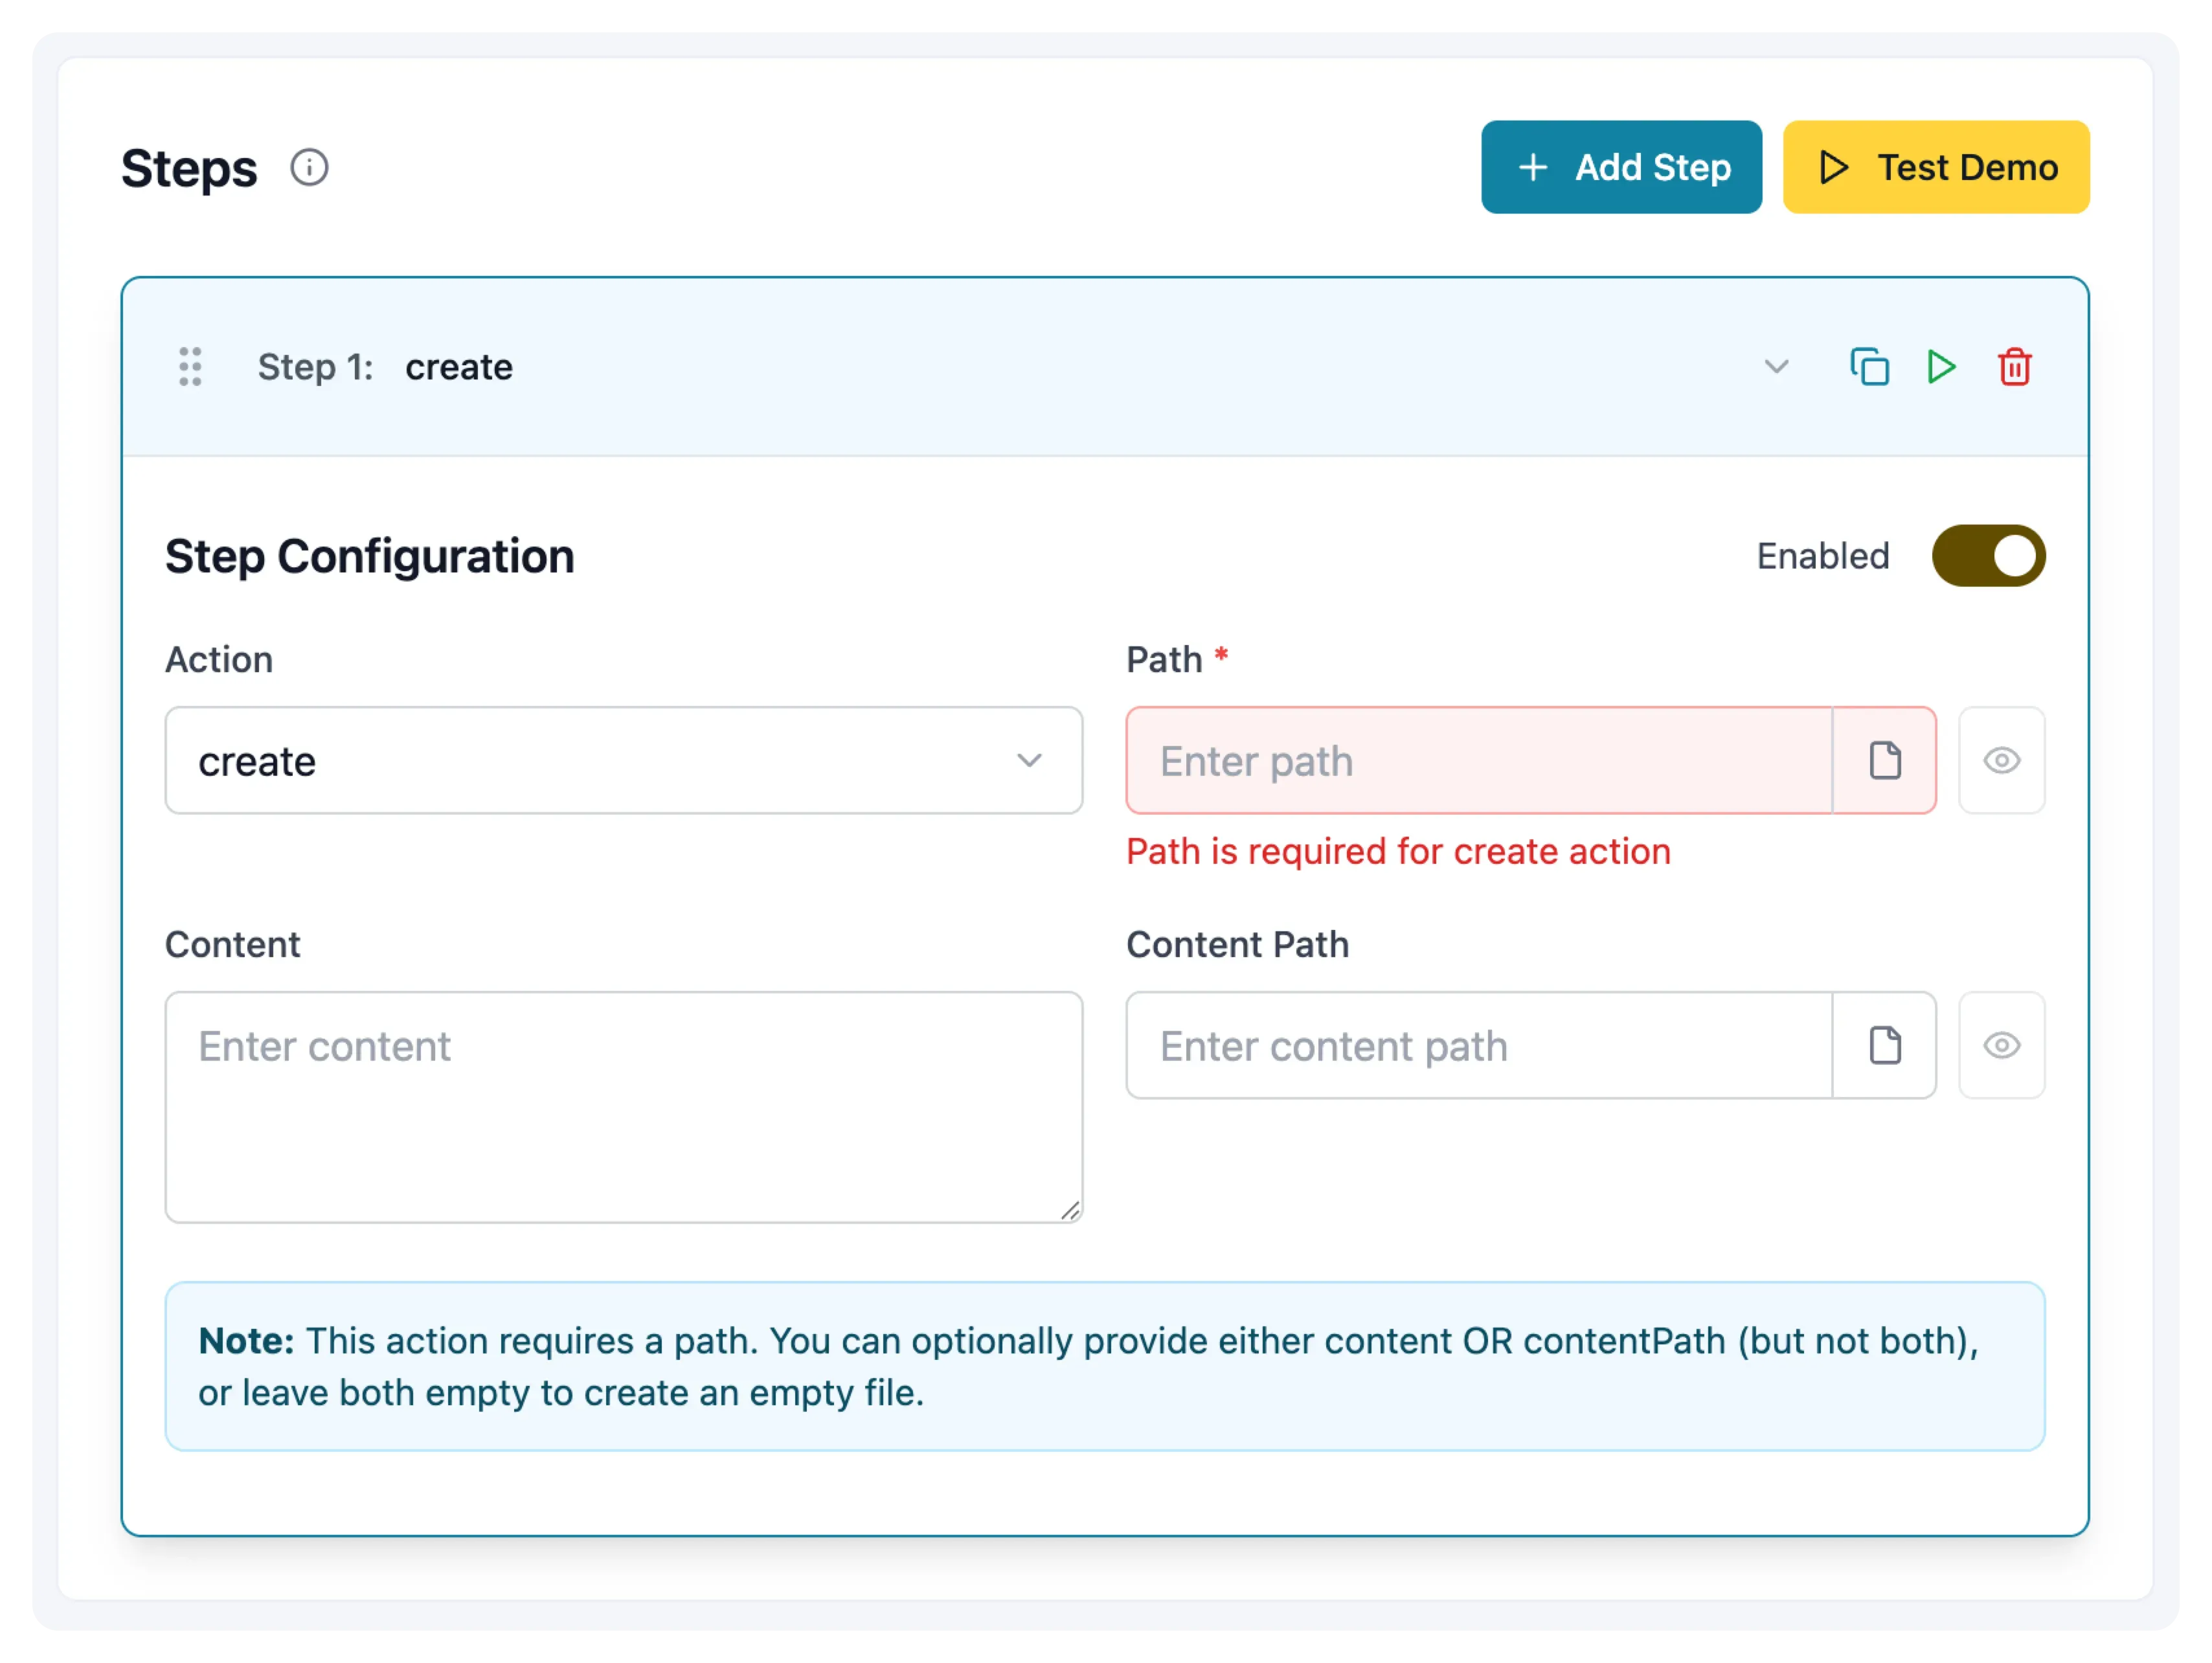
In the Action dropdown, you can pick the action to perform for your step. The GUI will guide you through the available options per action.
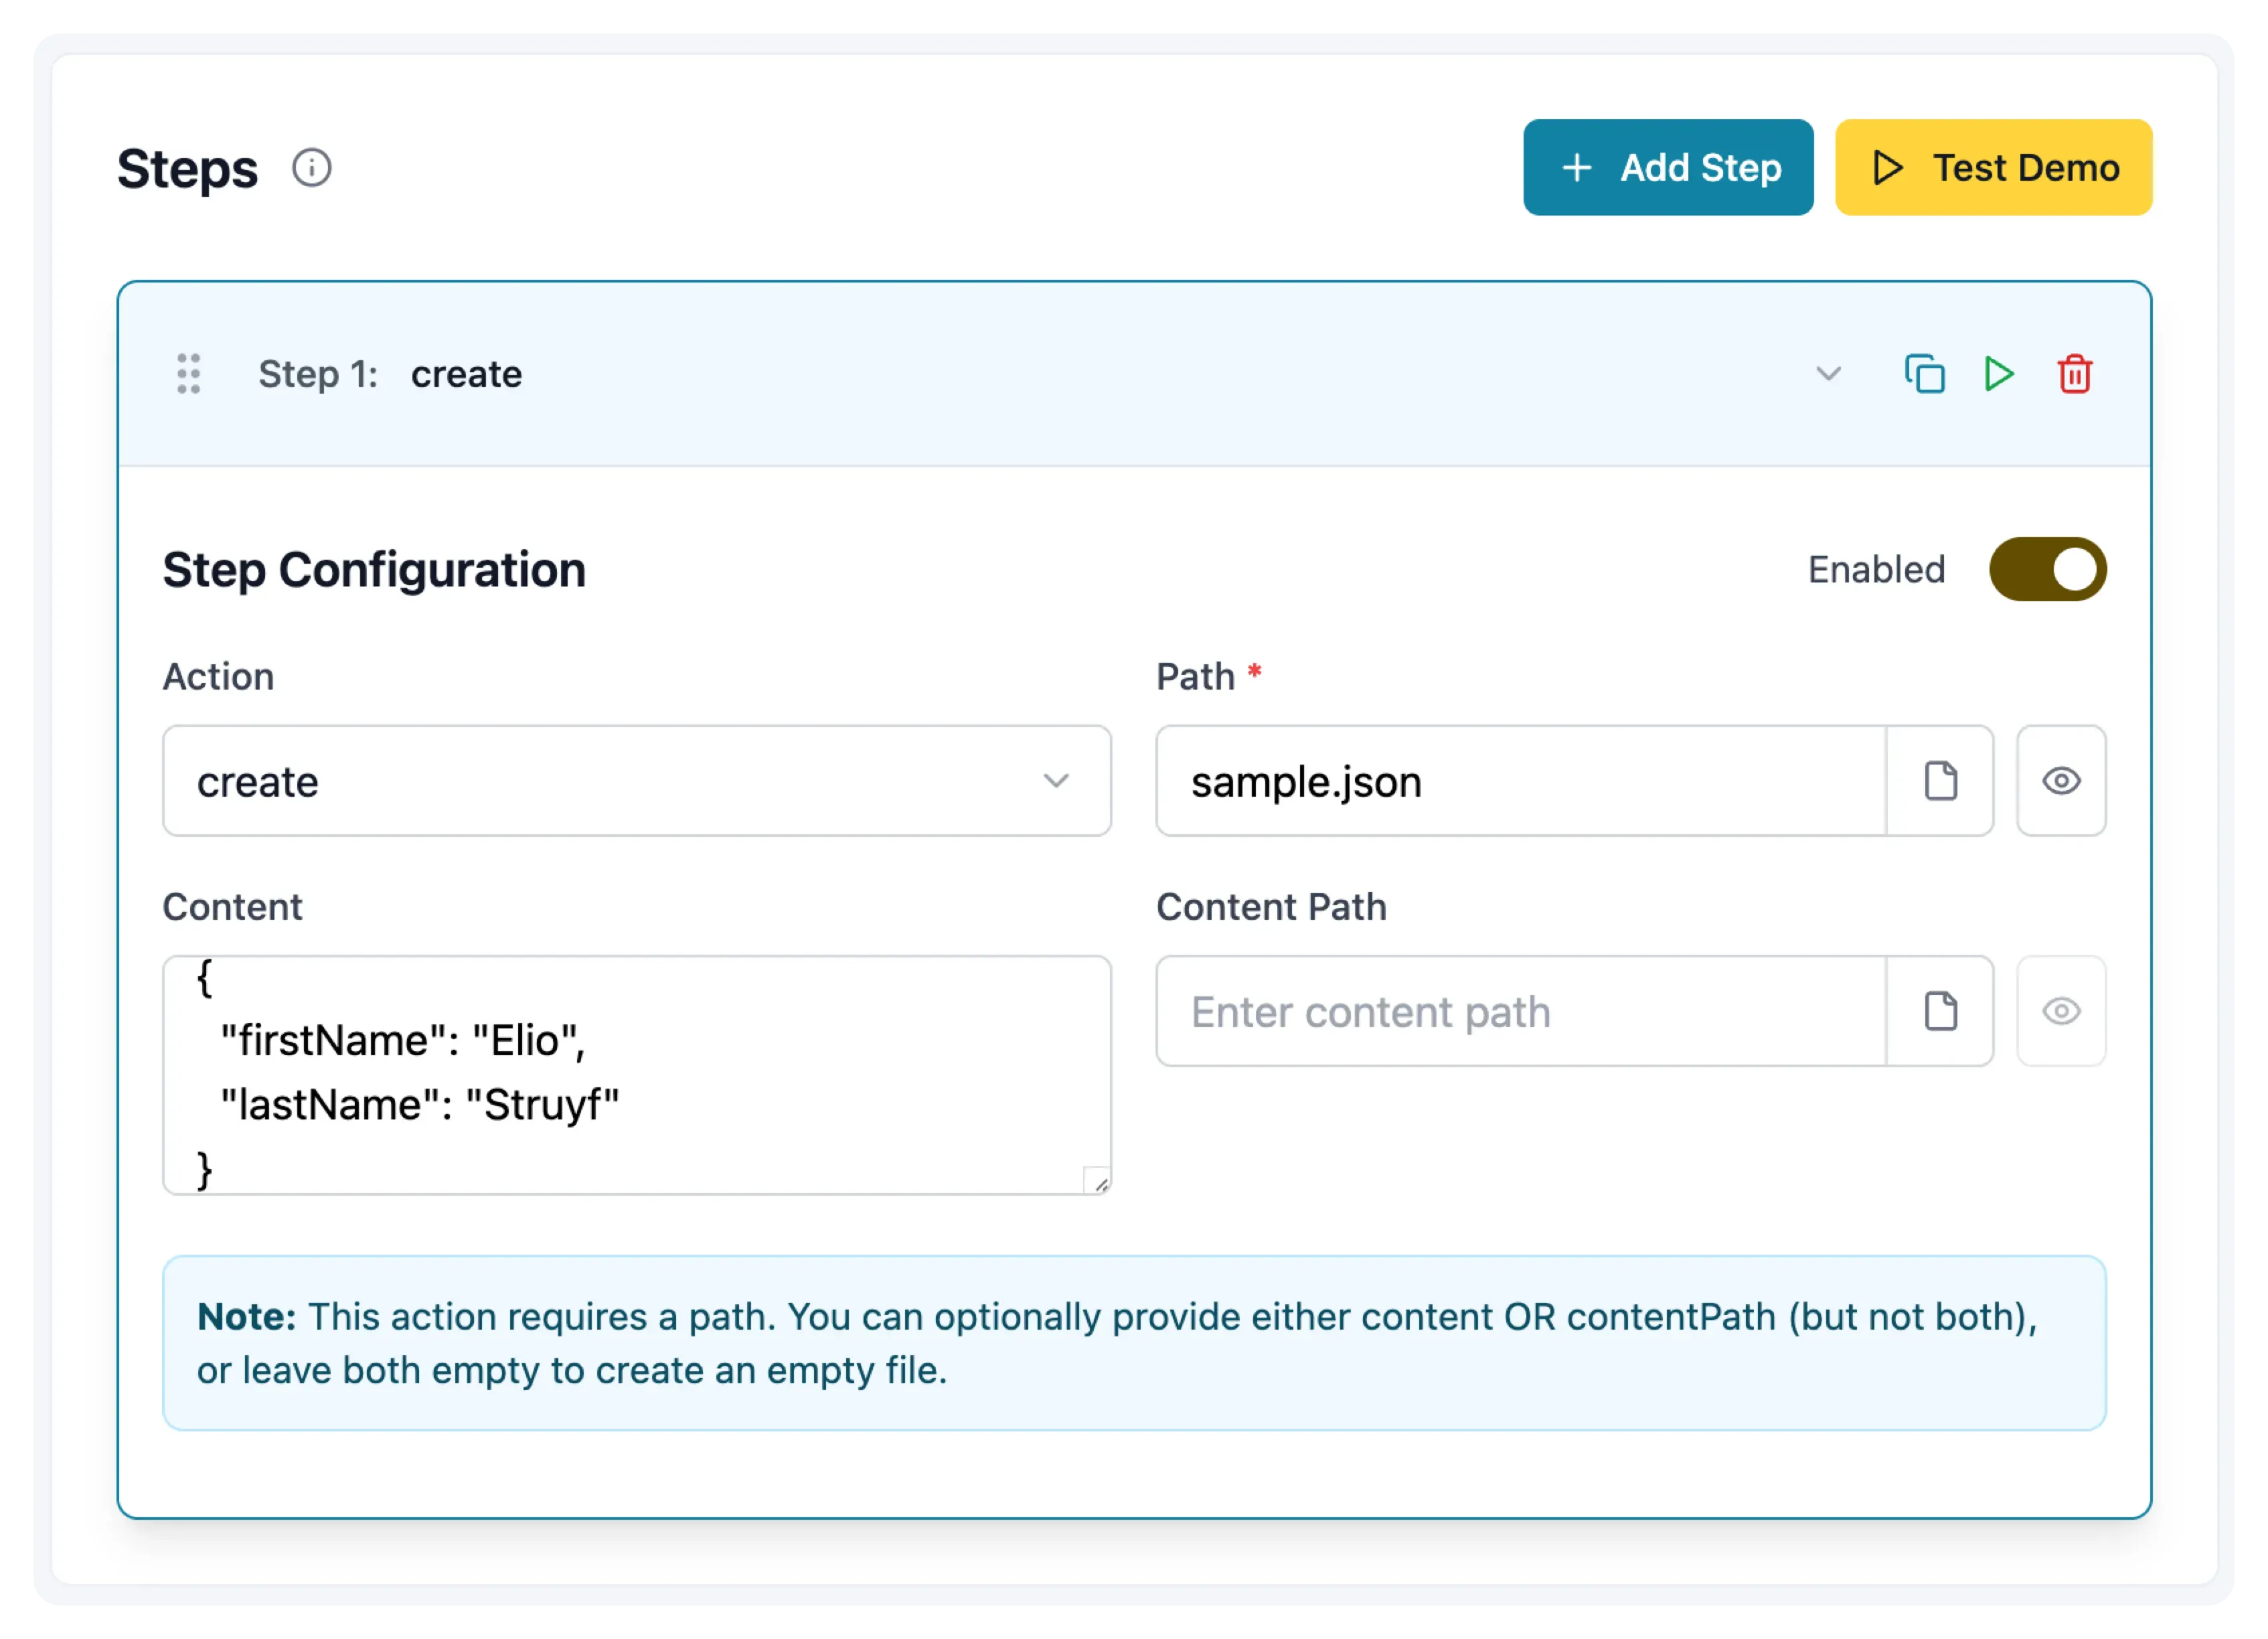
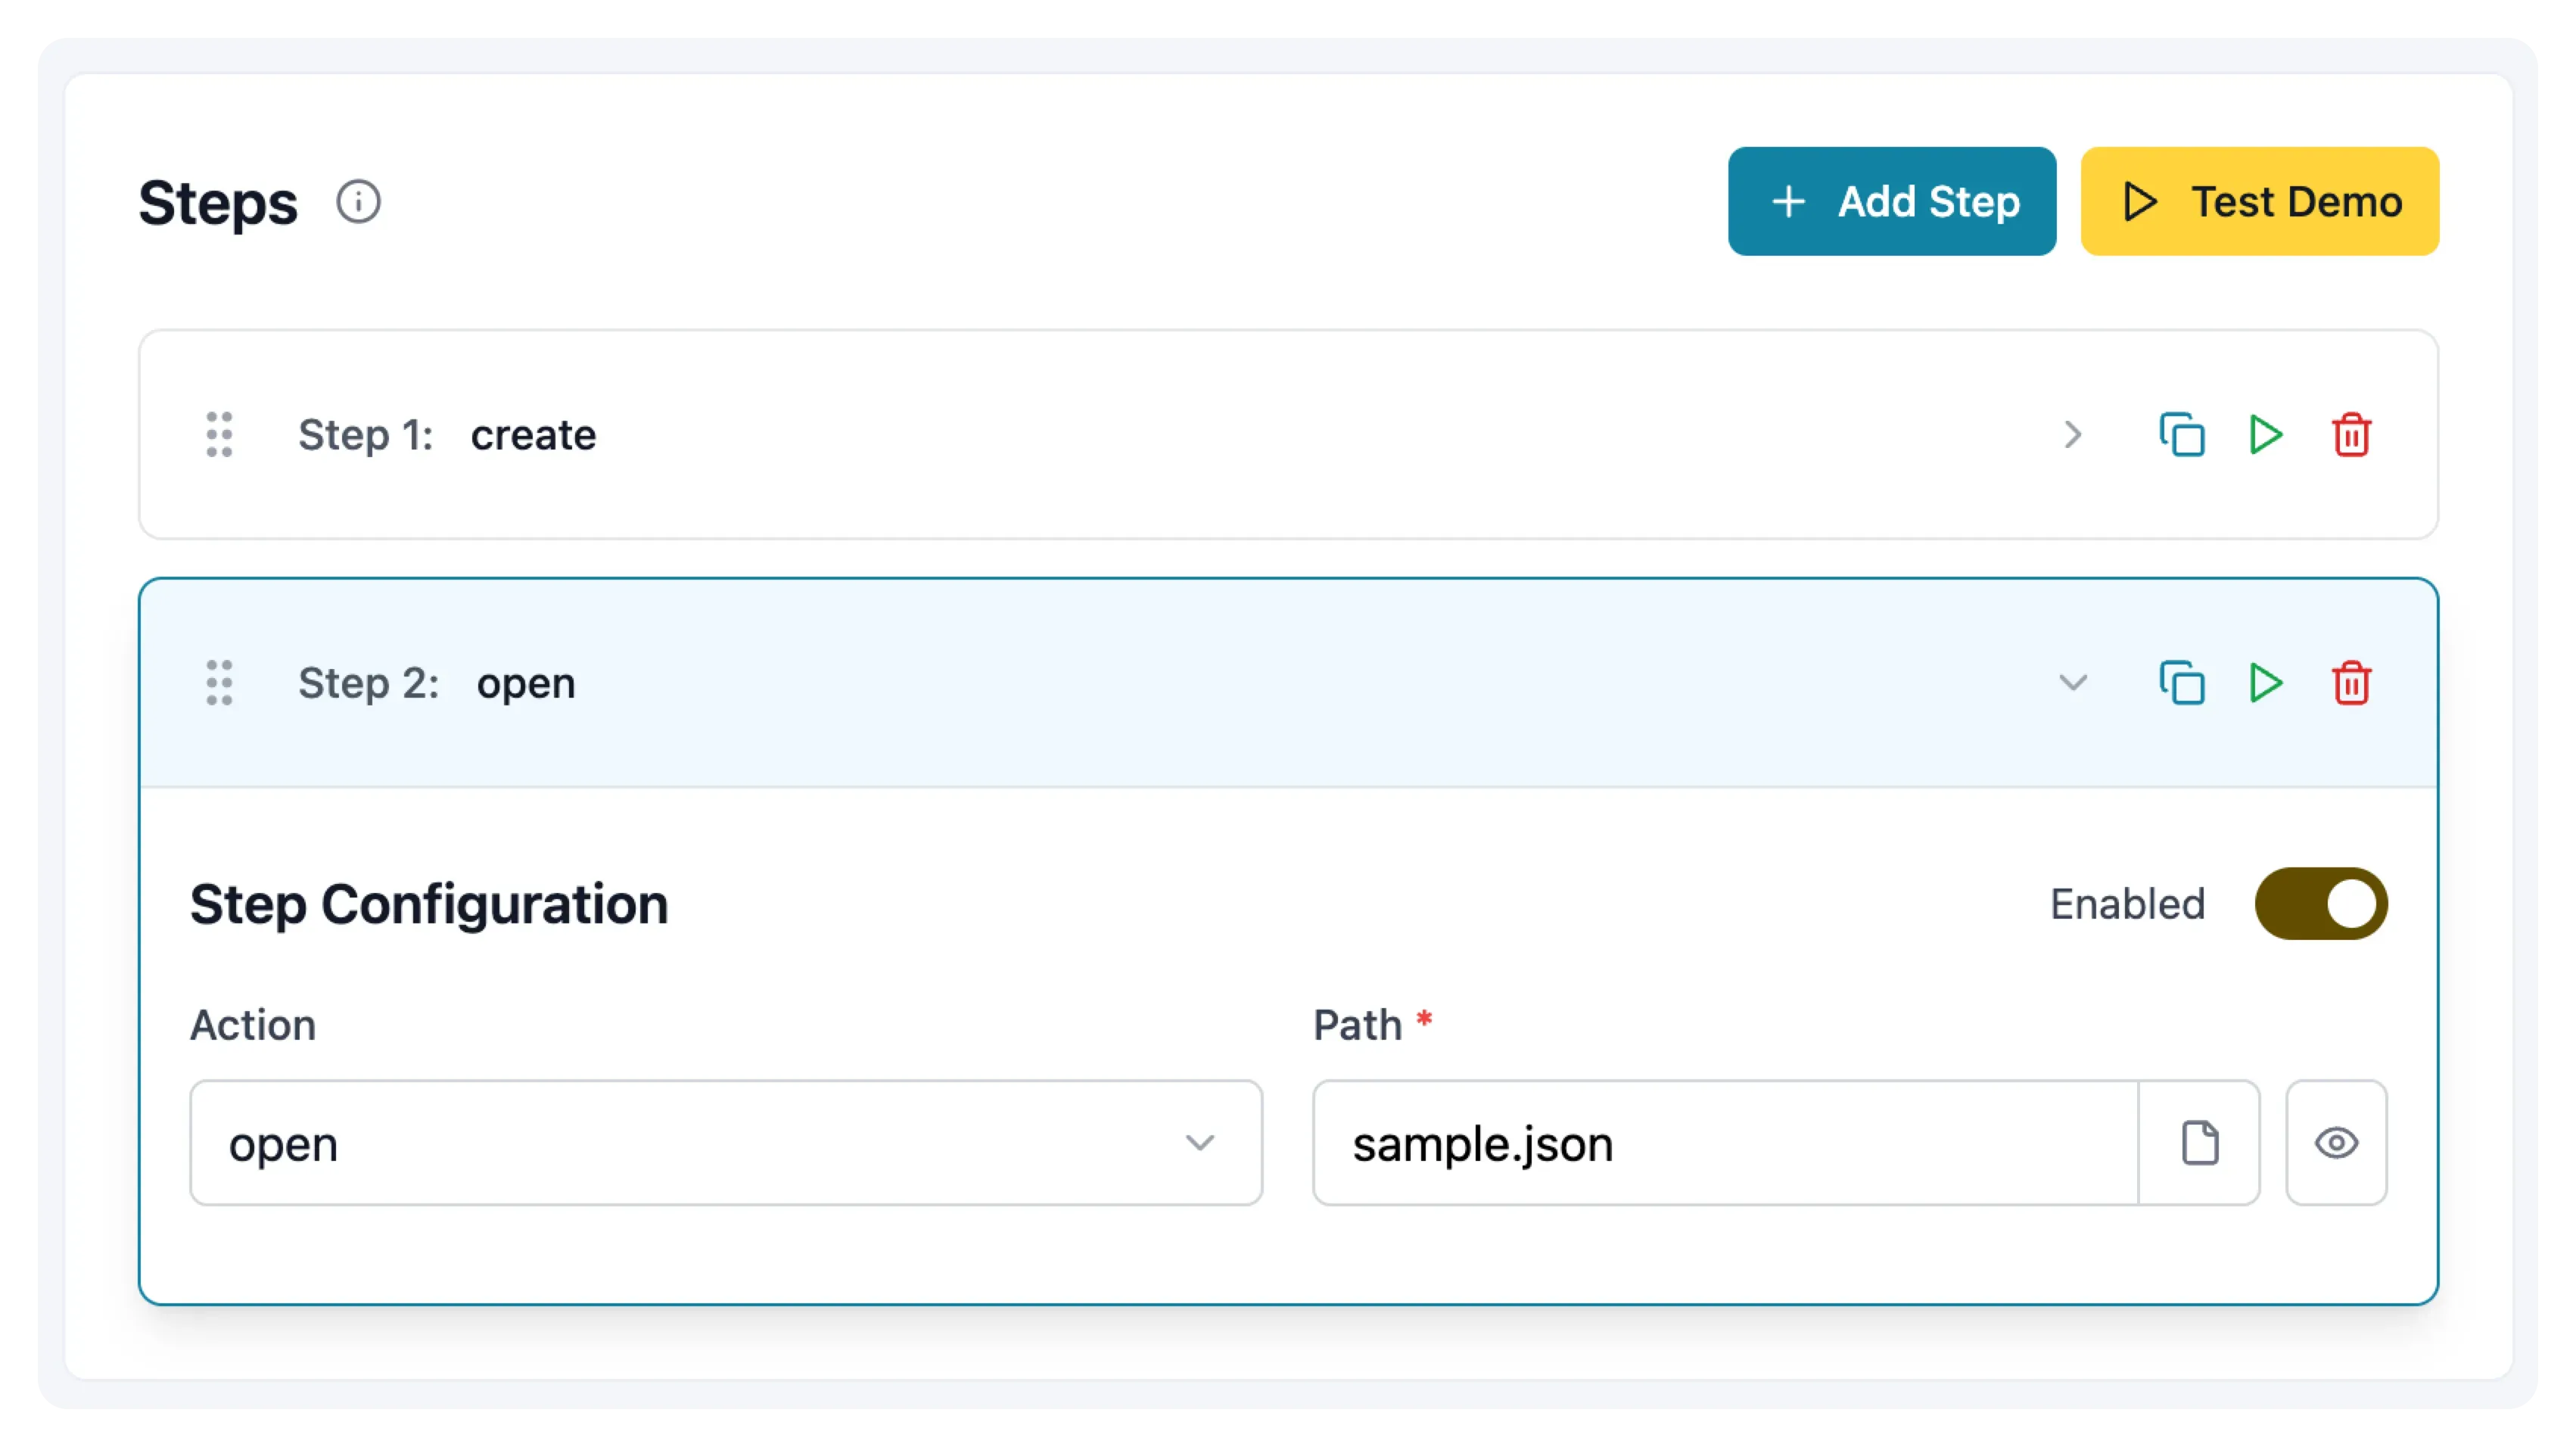
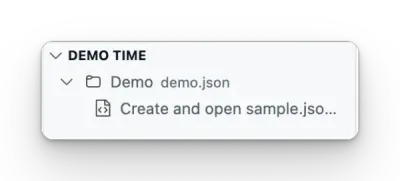
Once a step is configured, you can add additional steps, or new demos. Here is an example to open the file after the create action:
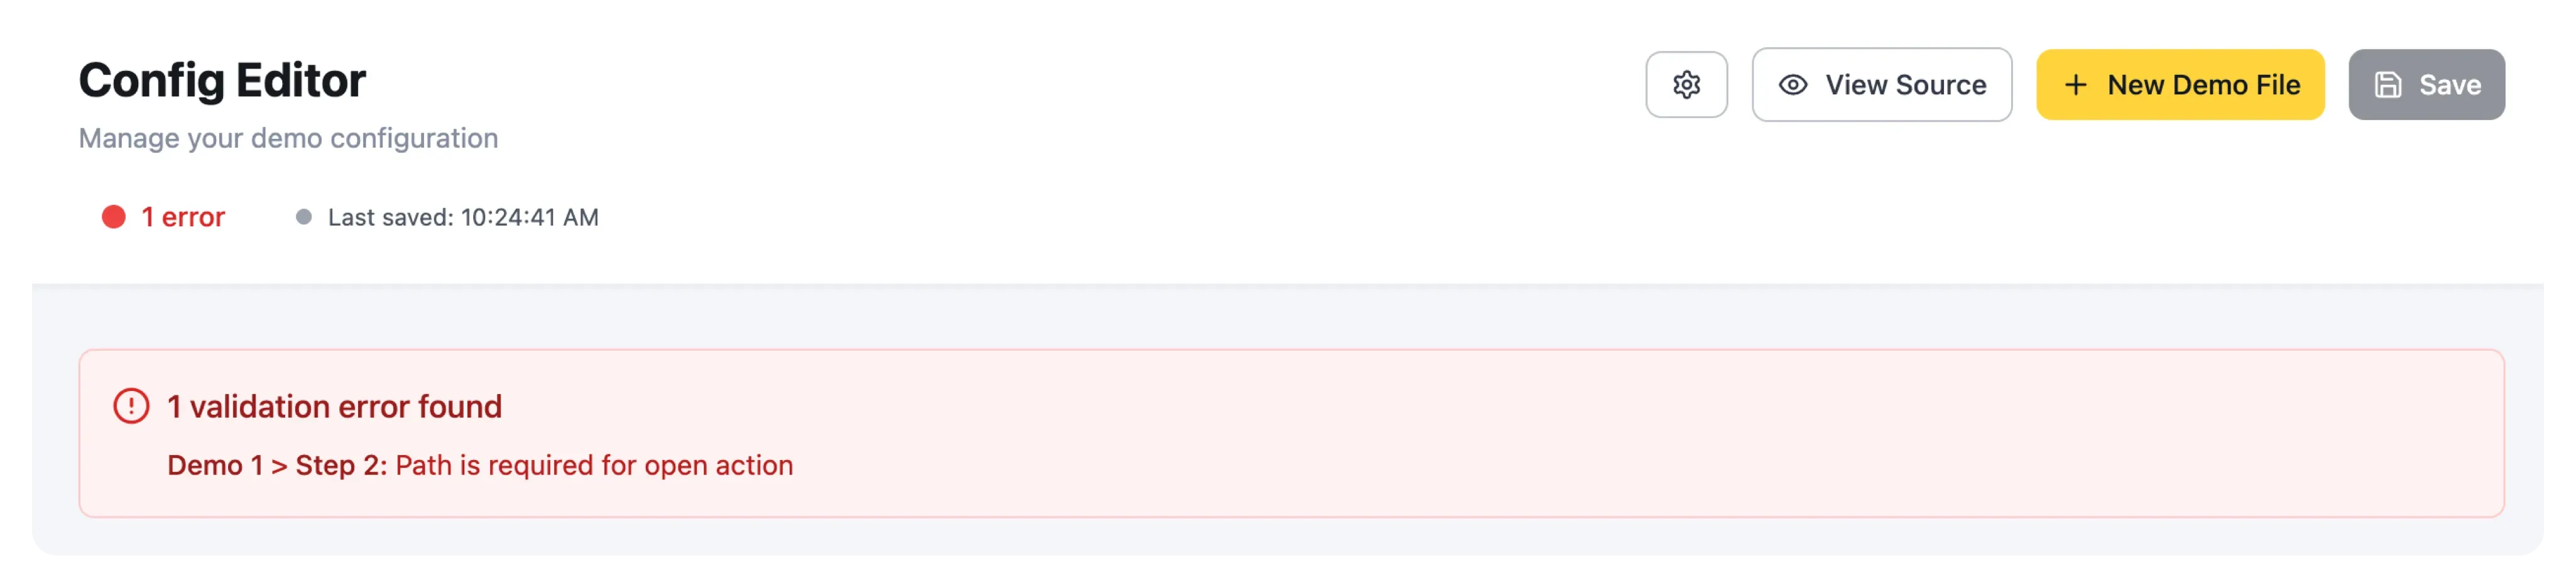
In the header of the Config Editor, you can see the validation status. If you click on the message, you can see the detailed validation errors and warnings for your demo configuration.
The default content of the demo.json file looks like this:
{ "$schema": "https://demotime.show/demo-time.schema.json", "title": "Demo", "description": "Demo description", "version": 2, "timer": 5, // Optional timer in minutes. You can also set it on global level with the `demoTime.timer` setting. "demos": []}title: Demodescription: Demo descriptionversion: 2timer: 5 # Optional timer in minutes. You can also set it on global level withdemos: []You can start adding your demos in the demos array. Each demo should have the following structure:
{ "title": "<title>", "description": "<description>", "disabled": false, // Disable a demo, when set to true, it will be skipped "steps": []}title: <title>description: <description>disabled: false # Disable a demo, when set to true, it will be skippedsteps: []You can also add icons to the demo to make them more recognizable.
{ "title": "<title>", "description": "<description>", "version": 2, "icons": { "start": "<name of the icon (optional)>", "end": "<name of the icon (optional)>" }, "steps": []}title: <title>description: <description>version: 2icons: start: <name of the icon (optional)> end: <name of the icon (optional)>steps: []Sample demo file configuration
Here is an example of a demo where you create a file and open it:
{ "$schema": "https://demotime.show/demo-time.schema.json", "title": "Demo", "description": "Demo description", "version": 2, "demos": [ { "title": "Create and open sample.json", "description": "Create a sample.json file with some content.", "icons": { "start": "file-code", "end": "pass-filled" }, "steps": [ { "action": "create", "path": "sample.json", "content": "{\n \"firstName\": \"Elio\",\n \"lastName\": \"Struyf\"\n}" }, { "action": "open", "path": "sample.json" } ] } ]}title: Demodescription: Demo descriptionversion: 2demos: - title: Create and open sample.json description: Create a sample.json file with some content. icons: start: file-code end: pass-filled steps: - action: create path: sample.json content: "{\n \"firstName\": \"Elio\",\n \"lastName\": \"Struyf\"\n}" - action: open path: sample.jsonAdding demo steps from a file
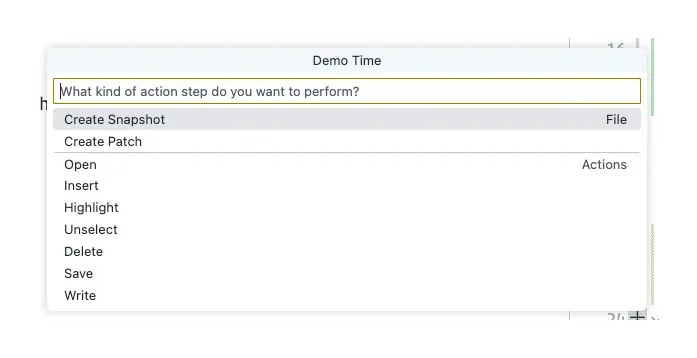
When you have a file open in the editor, you can add a demo step to your demo file by using the command Demo Time: Add demo step.
For example, if you want to highlight a piece of code, you can select the code and do the following:
- Open the command palette by pressing Ctrl+Shift+P or Cmd+Shift+P.
- Search for the Demo Time: Add demo step command.
- Click on the
highlightaction in the command palette.
- Select the demo file in which you want to add the step (only if you have multiple demo files).
- Select if you want to add it to an existing demo or create a new one.
Executing the demo
Each demo you add will be available in the Demo Time view. You can execute each step by clicking on the demo title or starting the presentation mode.
Adding notes to your demos
You are also able to add notes to your demos. These notes can be used to provide additional information for yourself or others who will be executing the demo.
The notes should be created as a markdown file.
When you open one of your demos in the Config Editor. Under the Demo Information section, you have the option to link a markdown file containing your notes or create a new one.
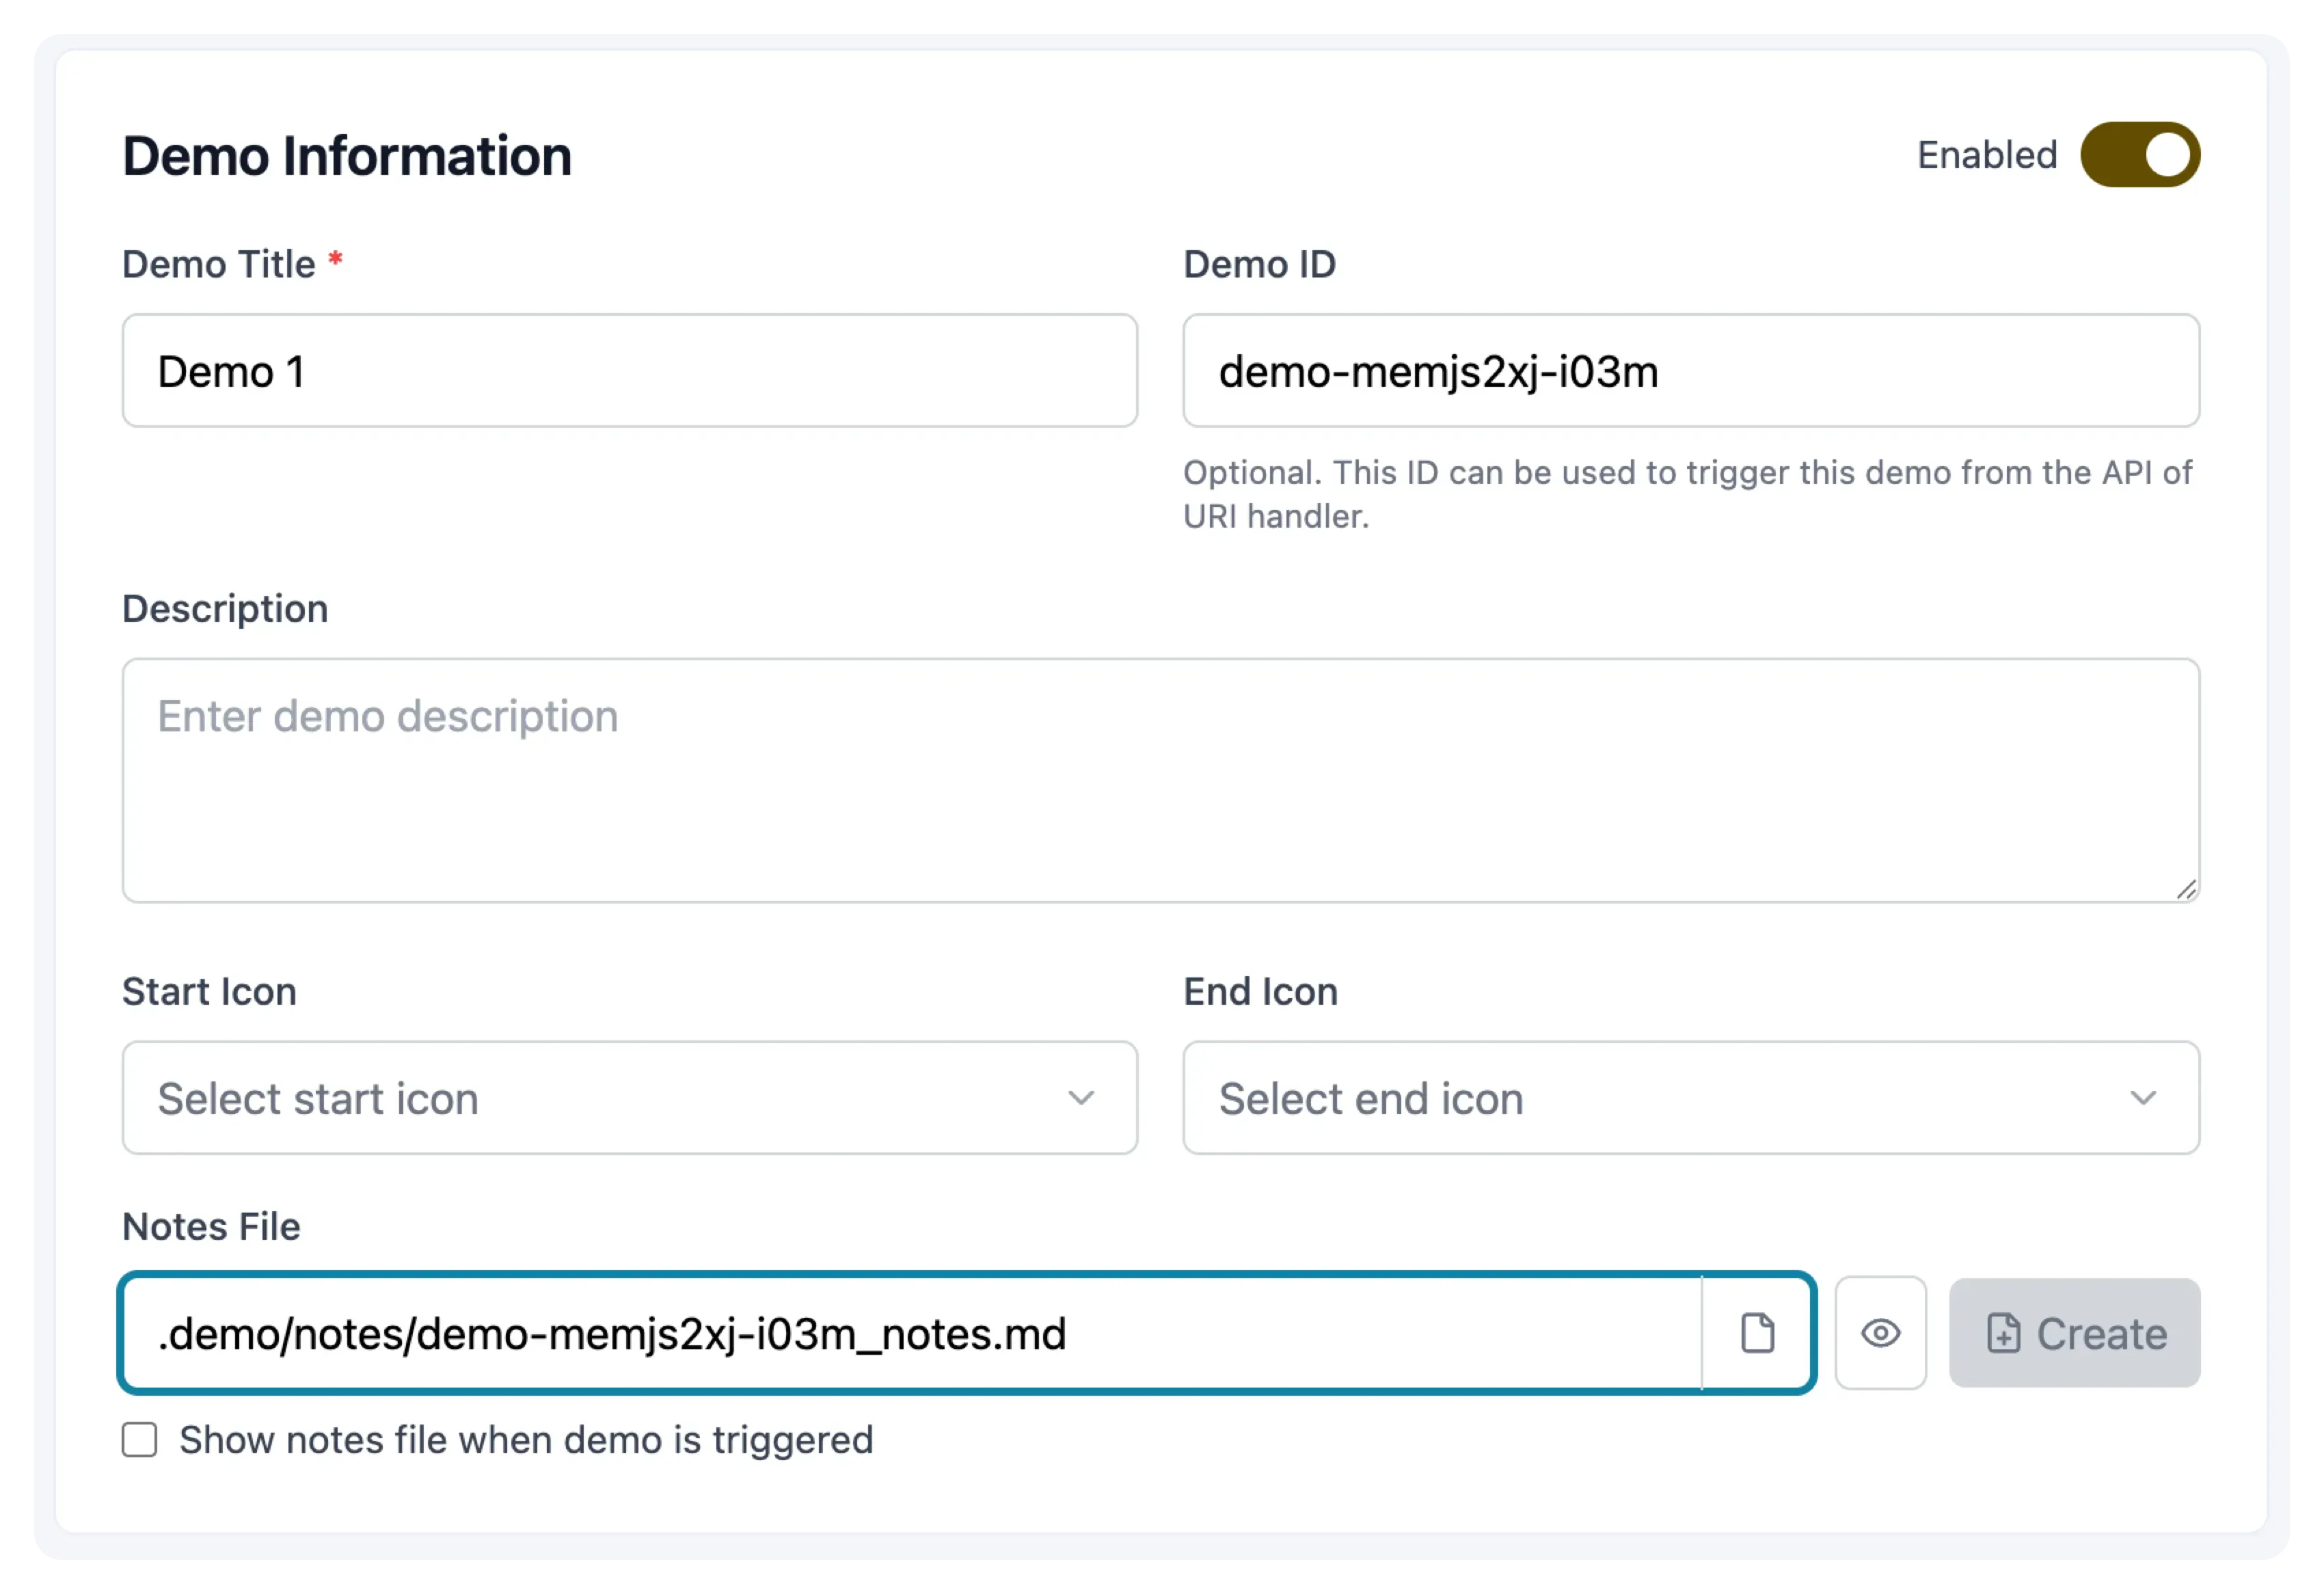
By checking the Show notes file when demo is triggered option, the notes file will automatically open to the side of your editor when the demo is triggered.
Here is an example of how you can add notes to your demo:
{ "title": "<title>", "description": "<description>", "version": 2, "steps": [...], "notes": { "path": "<relative path to the file>", "showOnTrigger": "<show notes on trigger (optional) - default is false>" }}title: <title>description: <description>version: 2steps: [...]notes: path: <relative path to the notes file> showOnTrigger: <show notes on trigger (optional) - default is false>Implementing other demos and steps
You can add more demos and steps to the demos array. In the actions section of the documentation, you can find all the available actions you can use to create your demos.